Blog: Case Study - REDU Wall Panels
5.8.2024 julkaistuOur project team at REDU will be attending Formnext 2024 in Frankfurt, Germany together with our 3DTY project partners. In preparation for the world’s largest 3D-printing exhibition we decided to design parts for our own exhibition area of the fair.
The idea is to cover a space divider at our stand with a 3D-printed panel. To test the feasibility, we chose to cover a wall in the carpentry department’s CAD lab with panels, a space that was due for an upgrade to improve the environment for our students.
The model was created in Siemens NX 2212, and features the REDU logo as well as a wavy surface pattern. The dimensions of the two outer panels are 165x1941x717mm (LWH) and the middle panel measures 117x1941x880mm. As for the print, we opted to use UPM’s Formi 3D 20/19 material, printing a bead of 4x1mm with a layer time of 20sec.
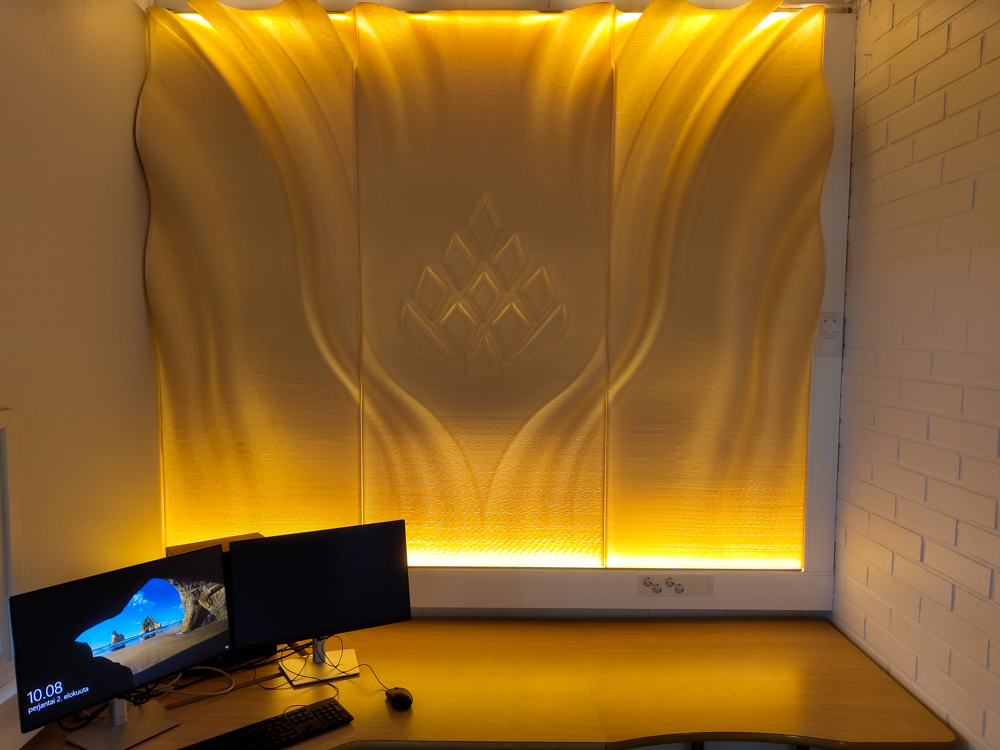
Finished Elements
Each element took nearly 11h to print and consumed roughly 13kg of material. A coat of clear water-based lacquer was applied to protect the surface from dirt, and to test the lacquer’s compatibility. All three panels fitted perfectly into place and were mounted using French cleats. Our electrical department kindly provided us with the LED strips to light the wall from the inside. The panels and light changed the feeling of the entire space, and created a nice atmosphere for our students. The process provided us with invaluable insights, which we can use to create even better panels for our stand at Formnext 2024.
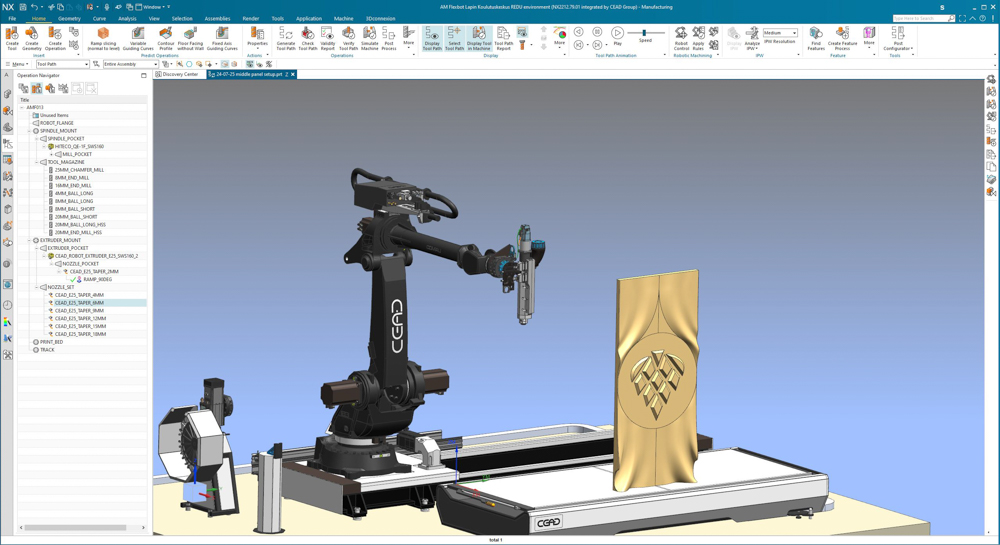
Picture: Preparing the print with Siemens NX
Observations
Although our CEAD AM Flexbot could print the entire element at once, we decided to split it into three sections to prevent warping at the base. Only very slightly warping occurred, validating our precautions. Inter-layer adhesion was also strong enough to suspend the panel from a French cleat, attached via 4 screws with large washers. However, what we did not anticipate was that such a thin element would start to sway under the regular movement of the robot once it reached a sufficient height. This caused the print to exhibit an additional surface pattern across the last 300-400mm of the panel, which is comparable in appearance to something like braided spaghetti. To prevent this when printing such a fine bead and narrow part, it seems advisable to limit the panel height to a value between 1000-1200mm.

Picture: Close up image of the panel surface.
Jakob Haerting,
Specialist for CNC-Machining and 3D Printing
This case study was carried out as part of the 3DTY 3D-Printing Collaboration Project, co-funded by the EU’s European Regional Development Fund (ERDF).
For more information please visit our project websites:
